
A How to Guide for Making GIF’s in Photoshop
FILED IN: EDUCATION
GIF’S are everywhere these days, especially with the rise of video-based content on Instagram and Tik Tok. While we know there are so many apps out there that allow you to quickly make a GIF on your phone, making them in Photoshop is incredibly simple and the best way to keep the quality of your GIF.
Follow along below for a step – by – step guide on how to make GIF’s in Photoshop.
Step 1: Be sure to edit all of your photos in Lightroom identically.

We typically edit the first image in the sequence and then sync it through to all of the images. Sometimes it takes a few minutes for Lightroom to fully sync the edit. Once it’s done, we scroll through the images to make sure that there are no sudden lighting changes throughout them.
We suggest having *at least* 15 images to make a GIF, we typically have 20-30.
Step 2: Save your images.
We typically save our images that we plan to use in a GIF into their own separate folder, it make the next step in the process a bit easier!
Step 3: Import your Images into Photoshop.
Once your images have been fully exported from Lightroom , it’s time to import them into Photoshop.
- Open Photoshop
- Click Files –> Scripts
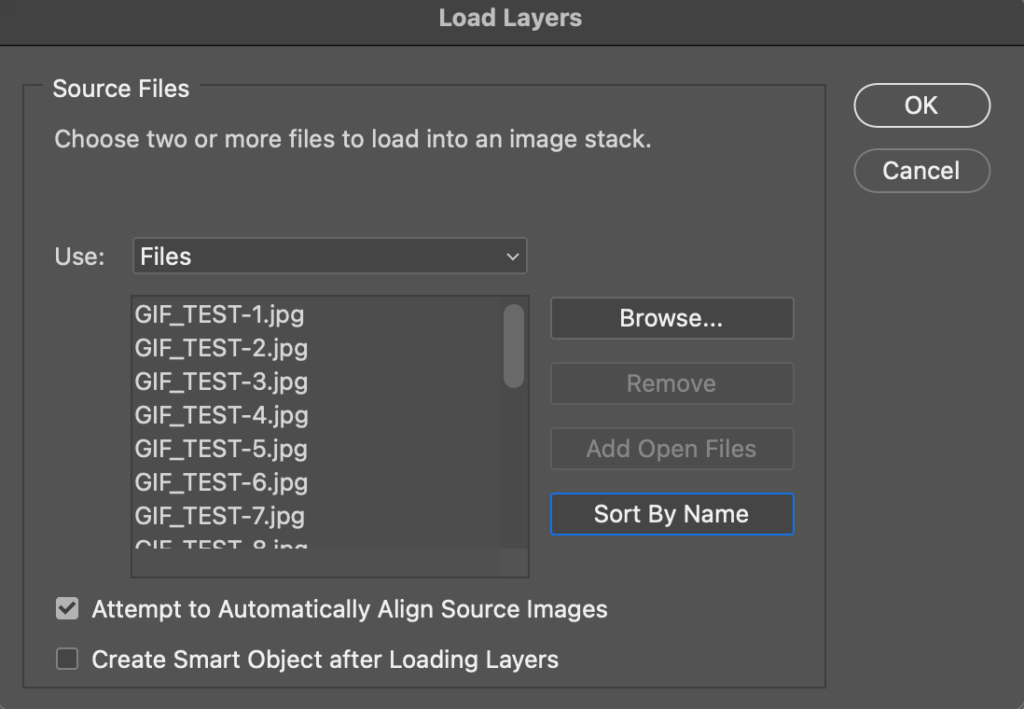
- Load Files into Stack… (a new box will now pop up)
- Click “Browse” and find + select all of your images (this is when having them all in one folder helps)
- Check the “Attempt to Automatically Align Source Image” button
- Click “Sort By Name”
- Hit “Okay”
This will prompt Photoshop to open a new document and start loading your files in as Layers. Depending on how many images you’re using for your GIF this could take a few minutes.
While the images are loading into the document, click “Window” and make sure “Timeline” has a checkmark next to it, this will make a timeline pop up along the bottom portion of Photoshop.
Step 4: Create your timeline.
Once all of your images are fully loaded in, it’s time to create your timeline.
- Click “Create Frame Animation” in the timeline (this will add what looks like one image into the timeline. )
- Click the three lines at the far right end of the timeline
- Click “Make Frames From Layers”
- Click the three lines at the far right end of the timeline
- Click “Reverse Frames”
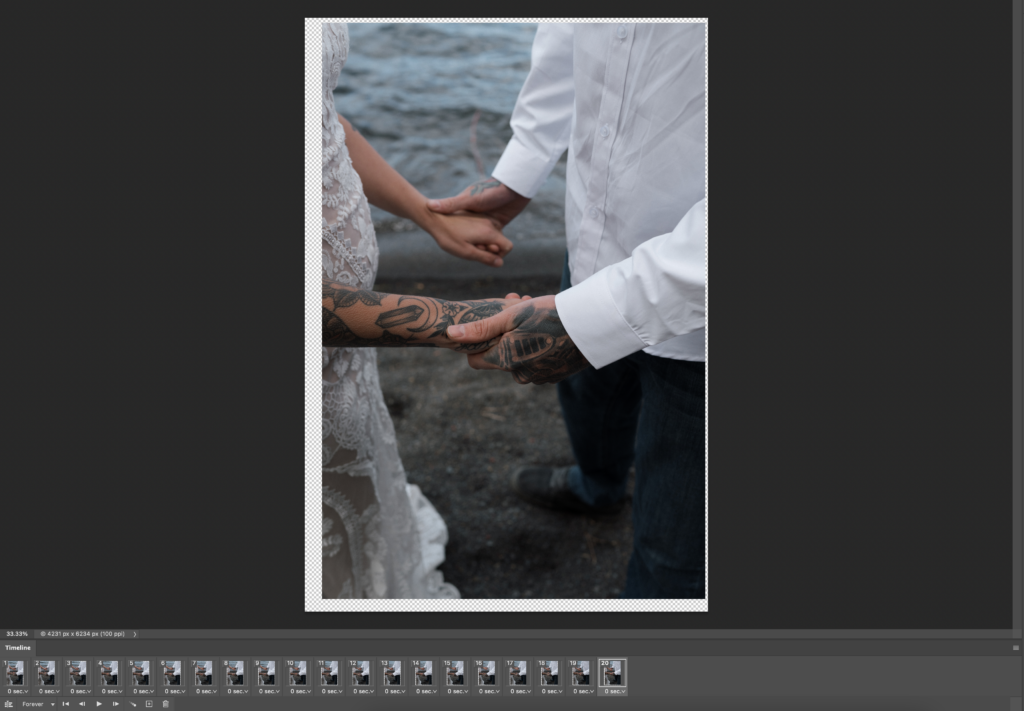
By this point, your Photoshop document should look like this:
Step 5: Prep your timeline to be exported.
Now that you have all of your images in your timeline, it’s time to prep them to be exported. You’ll see that your image has a checkered background around it, that is okay and perfectly normal.
You’ll want to use the “Crop” tool and crop the first image down to whatever you desire the GIF to be. Once you crop the first image, Photoshop will automatically crop all of the other images in the Timeline to match. Be sure to click through all of the images in the Timeline to check that it properly cropped out the checkered background in all of them.
Once that is done, select all of the images in the Timeline (click the first image, hold shift and click the last image). You’re then going to click the down arrow next to “0 sec.” and hit 2. This is the time that each image will show throughout the GIF, we prefer 2 sec. each but you can play around with it yourself.
At this point, your Photoshop document should look like this:

Step 6: Resizing your GIF.
To make sure that your GIF quality doesn’t get degraded by your blog or social media, we have to resize our GIF.
- Image
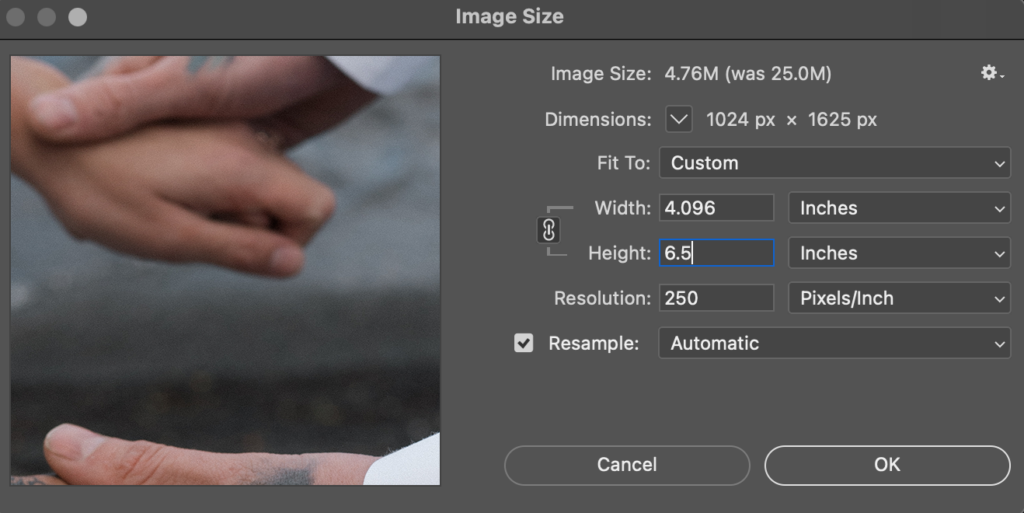
- Image Size
- Make sure the “Image Size:” under 5.0M
It’ll look something like this:
Step 7: Exporting your GIF (for Instagram).
Once you have you GIF ready to go, it’s time to export it. We also export our GIF’s as videos to keep them the highest quality possible for Instagram. If you’re wanting to post them on your website or blog, skip to step 7.
- File
- Export
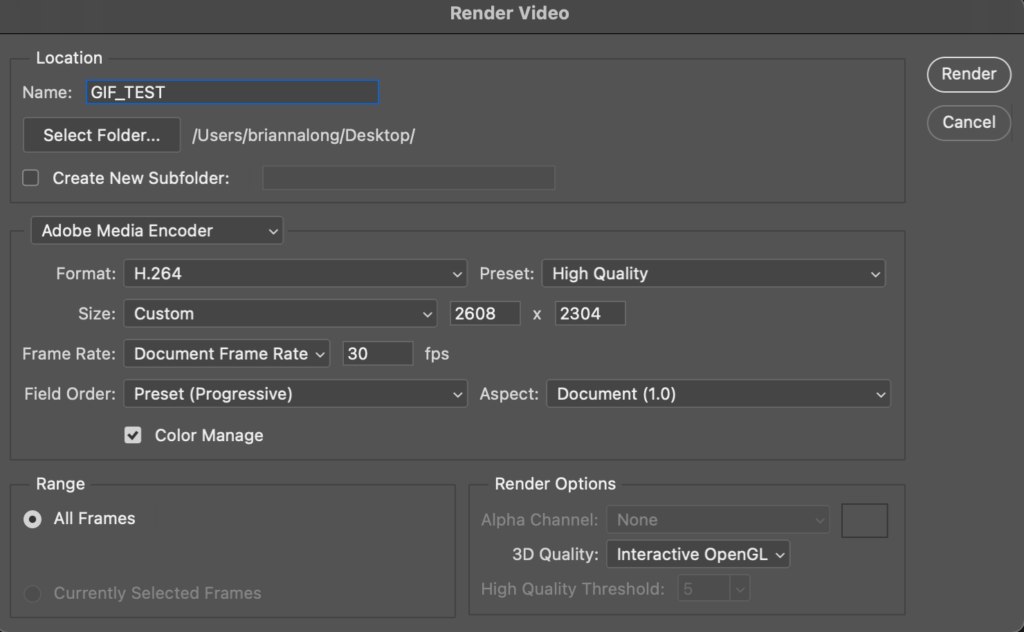
- Render Video
- Leave every setting the same, minus the name and where you want to save it.
Your “Render Video” box will look like this:
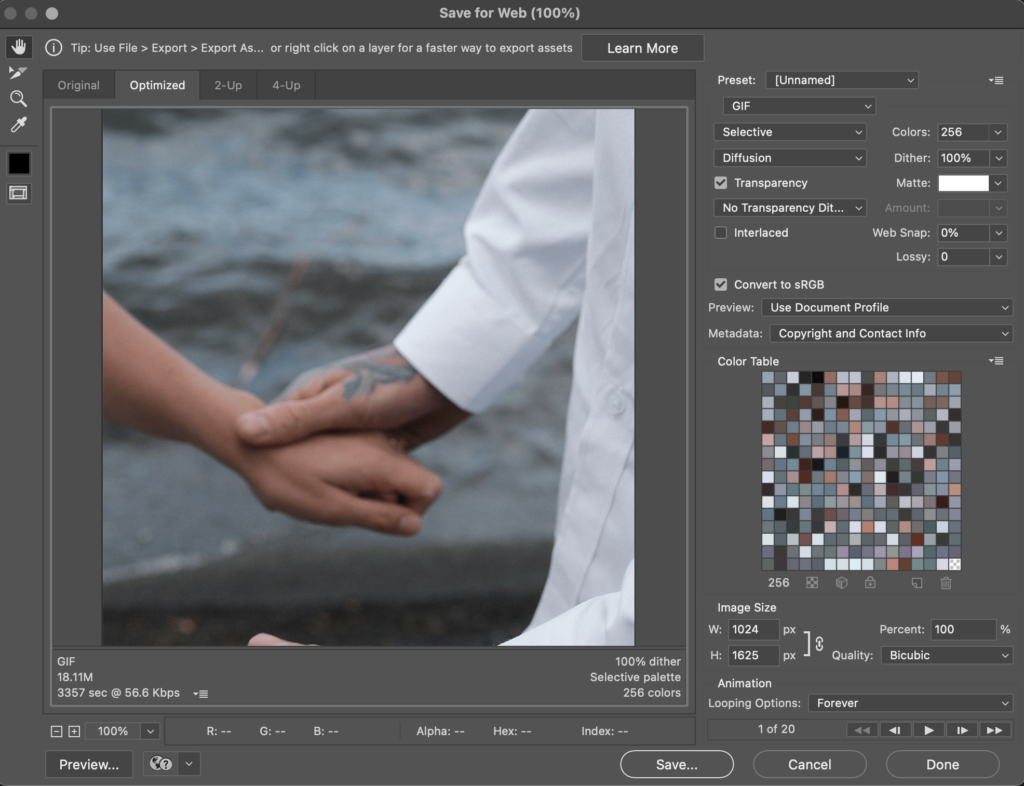
Step 8: Exporting your GIF (for your blog).
- File
- Export
- Save for Web (Legacy…)
- Make sure “GIF” is selected on the dropdown directly under “Preset”
- Set your Colors to 256
- Set your Dither to 100%
- Click “Save
Your “Save for Web” box will look like this:
Step 9: You’re Finished!!
Congrats! You’ve successfully created your first GIF in Photoshop!
Here for community, not competition?
See where we are roaming next!
X
D & B

MEET D + B
We’re Bri and Dana, besties who met at a retreat in 2020 while searching for real connection in the photography world.
When that retreat fell short of what we needed, we decided to build it ourselves. That’s how The Roam was born, a space for photographers to grow, create, and find their people, without the competition or cliques.
We’re here to help you build your business and your community, because you shouldn’t have to choose between the two.


")

